Functional 3D Printing

4 readers
1 users here now

Welcome fellow prototypers! This communities' purpose is to help others and share functional 3D Printing related information. While other 3D Printing Communities are a good resource, sometimes too many help posts get buried under memes and fluff. This will remain technically focused and keep the fluff removed. Please help your fellow 3D Printer hobbyists as much as you can with their issues! and showcase your functional prints and how you use or created them.

founded 2 years ago
26


Whipped up this quick wall mounted spool holder. made to accommodate 1.1kg spools and under at 100% scale and should accommodate 3kgs by just upscaling. feel free to remix and repost all I ask for is oc credit.

27
28


Update 2023-11-27: This thing is Version 1 of my adaper. I have now designed Version 2, with the following improvements: the smartphone's center of gravity is now directly above the mounting screw, which gives the tripod a more secure stand, The tripod adapter is now even more compact and lighter. You can download this new version 2 for free here or here. Summary (Version 1) This compact tripod mount can hold almost all smartphones with its clamping range of 64 to 84 mm. It can easily be printed as a single part (“print-in-place”). No other components are required other than a rubber band. For smartphones with slippery sides without a case, self-adhesive silicone bumpers can optionally be glued in. Printing Instructions: Use a 0.4mm line with a layer height of 0.2mm. Print the object in the specified orientation. If possible, place the Z-seam as shown in the image above. There are two print files, with 0.3mm clearance and with 0.25mm clearance ("...tight-fit"). If your printer prints precisely, I would use the latter. Assembly Instructions: Before using the adapter, the assembly of one or two rubber bands is required. Using two rubber bands instead of a single one can increase safety. Smartphones with silicone cases usually hold well. For smartphones with slippery sides without a case, recesses have been provided into which optionally cut self-adhesive silicone bumpers with a thickness of 2 mm and an edge length of 7 mm can be glued (see pictures above). Instructions for Use: Before inserting the smartphone, please check whether the rubber band(s) are still intact. The smartphone could fall out if the rubber band(s) break. The adapter has a printed thread to accept the mounting screw. The screw hole is 11mm deep. If your tripod has a removable lock nut on the mounting screw, you can remove this nut and thus increase the usable thread length of the screw. This increases stability. See picture above. The printed thread can wear out. Check the screw connection for tightness.

29


This is a fully re-modeled build of a MicroSD case inspired by Kozalakis's one, borrowing some ideas from Kroki's remix of it. I didn't actually use any of their source, rather building from scratch using SD/MicroSD card dimensions. This version relies on fairly close tolerances, so it may be a bit temperamental on some 3D printers (Details below). The main differences from the other two: The case holds 10 MicroSD cards (2 x 5) There are registration tabs in the slots, so the SD adapter lid should only go in with the label side out and the connectors on the inside of the box. The SD adapter should register with the card retention tab on the inside of the slot (The original design used the write-protect tab slot to register the card). Depending on the material used and tolerances, this may be tight or wear out after a while. The SD adapter can be pushed-out from the connector end (the main reason for Kroki's remix). The model is intended to be printed with the notched “connector end” of the case DOWN. The print should not need any supports as all overhangs are either short (i.e. inside the MicroSD slots) or gradually sloping (the inside-top of the box). I added a second version that has added 0.2mm thick “frog toe” sprues on the outer corners of the base. These may assist with bed adhesion and preventing curling during the print. The sprues are more easily removable than a conventional brim addition and use less material too. This was all done using a free OnShape account and the model source is here

30


This is a strong corner for fixing three planes. Print as in the screenshot. Added a new v2.1 version! The area of contact with the planes has been increased by adding small overhangs that do not affect the print quality. Added a new v2 version! Removed overhangs for simpler print quality. Increased base area for better adhesion.

31


Similar tools are sold online, pretending to help creating friendship bracelets. I was curious, so I created one for my daughter. Even not really needed it helps to keep the right order of the strings, which helps the younger ones... You should still attach the initial end of the strings somewhere so you can give some tension on the strings... Due to the thread this required 0.2mm when I printed it... Have fun!

32


CyberLevel. It’s a digital spirit level for camera operators with a circular touchscreen, some Lemo connectors on the other side and a 1/4-20 thread of the back (aluminum gear set insert, much lighter) . Printed on my 6 years old HyperCube Evolution in CF PETG.

33


It helps categorise, manage, and present content effectively, commonly found in applications. About 130mm in width x 30mm in height. An add-on is an optional component, feature, or extension that can be integrated into an existing system. More designs on Printables: https://www.printables.com/@ChrisTech Change Log: 7 November 2023 Create an extension part to link with another partition. 15 November 2023 Fine-tuned the design's tolerance.

34
 
 
35


File here. This is almost definitely not the best one that anyone's designed, but at least it's a little unique!

The holder parts bend apart to snap brushes in and out, and there's a little shelf above to put your toothpaste on. The shelf has print-in-place hinges so you can print the whole thing flat with no support and it all works with no assembly.

36
37


We put this together for my public library's makerspace. I have a bunch of issues with the design, but it does work so what can I say really. Specifically it's this one.

Patrons can use it for whatever they want, i.e. melting dissolvable supports faster, culturing bacteria, etc.

38


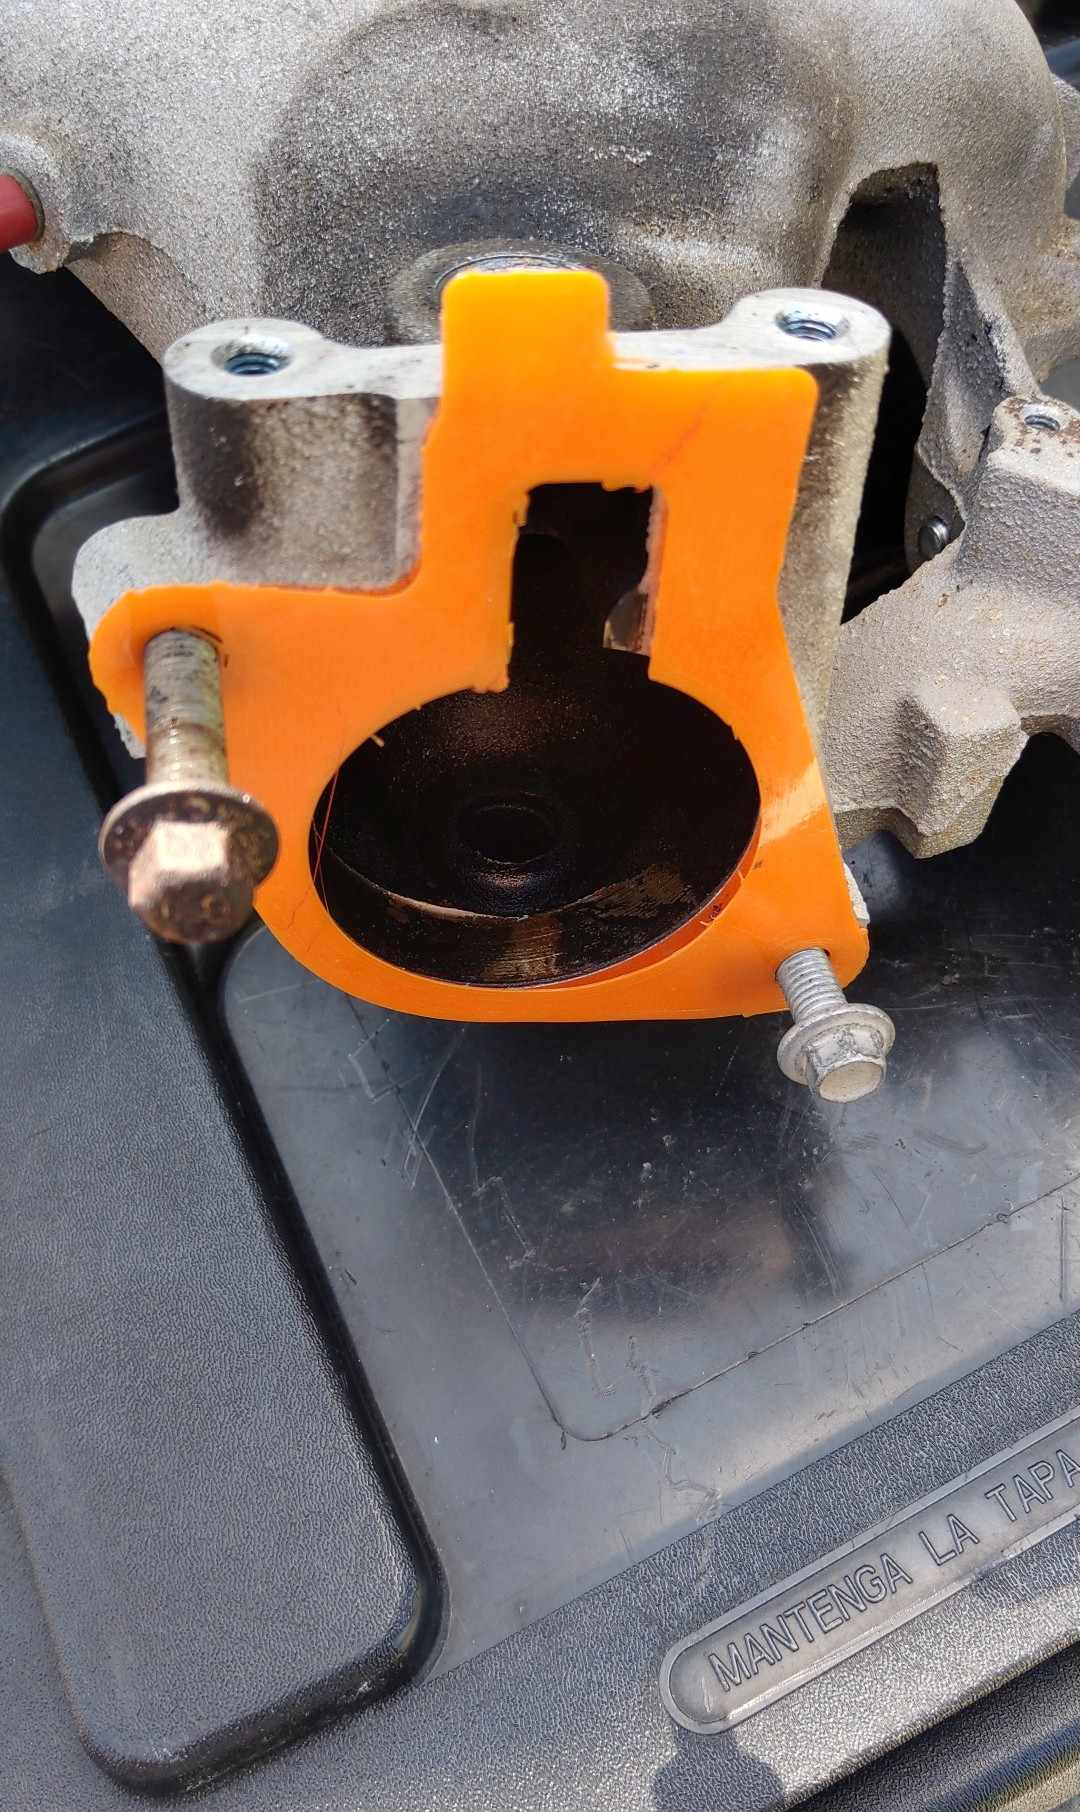
Swapping out a broken intake manifold and needed to replace my throttle body gasket. Printed in orange TPU because that's what I had on hand.

39


I'm in the process of building this - should be done within a week if my needles will come in. Really looking forward to it since I started hand knitting a pair of socks ~4 years ago and they're maybe 20% done :D

Prints are pretty easy but two are longish (15hrs and 27hrs on my machine/ settings).

Anyone tried something similar?

https://m.youtube.com/watch?v=2y1gakl4IEw

40
1
Cord Wall Pass-through (www.printables.com)
submitted 2 years ago* (last edited 2 years ago) by ShadowRam@kbin.social to c/functionalprint@kbin.social
41


Cable organizer.

42
 
 
43
 
 
44
1
submitted 2 years ago* (last edited 2 years ago) by XRaVeNX@kbin.social to c/functionalprint@kbin.social


My wall power outlets at home do not have a center screw. Some 6 way splitters have a center hole so you can secure it to the outlet such that it won't pull away when you unplug something.

So I made this. It uses the existing screws from the wall plate.

Printable Link

45
 
 
46
1
submitted 2 years ago* (last edited 2 years ago) by MBStudio@kbin.social to c/functionalprint@kbin.social
 
 
47


I made this design so that I can take all of the gadgets and prototyping electronics that I work on and attach it to my laptop making my setup much more portable. I was too late on submitting for the magnet contest, but made an instructables guide on how to set it up. I also have a printables post for the 3D parts. I have mounts for Arduino Uno, a few breadboards, Pico GPIO expander, and more are on the way. Let me know what you guys think! :)

48


cross-posted from: https://lemm.ee/post/1009849

I'm planning to print up a bunch of brackets to mount LED shop lights (very similar to these) to the ceiling in my garage. My plan is to use an upside-down "U" shape bracket that screws into a joist/drywall anchor in the middle and then sort of clips around the sides of the metal frame.

Maybe filament type doesn't matter much here, but I'd rather not come out to one of the lights having fallen on my car if I can help it 😅

I think the main considerations are just temperature and stiffness. It can get up to about 85F in the garage on the hottest summer days, and probably a few degrees warmer by the ceiling. The lamps are cheap LED tubes, so the metal housing only gets slightly warm to the touch (say 90-100F or so). I know PLA is a bit stiffer at room temp, but I'm worried it might soften too much at the worst case of warm temperatures.

Any thoughts on PLA vs PETG for this situation?

49
 
 
50
 
 
view more: ‹ prev next ›